ECS Clear Sidemarkers
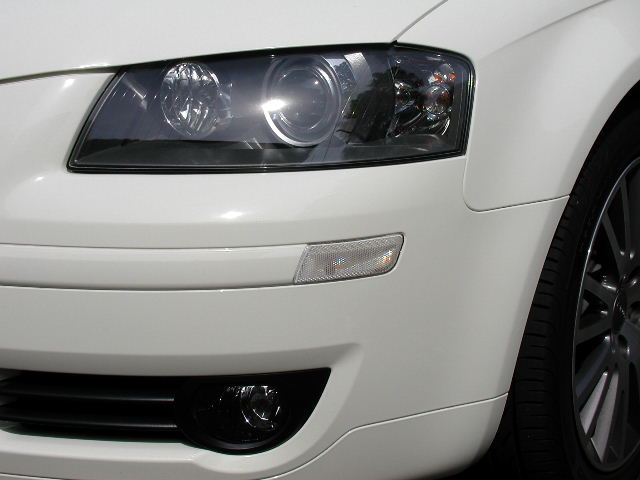
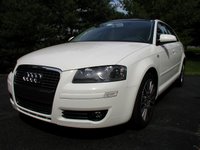
ECS finally released the 'clear' sidemarkers for the A3 (non-S-Line bumper). There are some cars that really benefit in appearance by eliminating the amber reflectors/lenses, and the A3 is definitely one of them. On my white car, there was no question that the 'clear' lamps would look awesome.
There are other things to consider besides looks, though. First, let's clear up some terminology that people mis-use:
- The lights that are located in the bumper, facing sideways, near the extreme front of the vehicle, are sidemarkers. They aren't 'bumper sidemarkers', nor in most cases 'parking lights'; they are sidemarkers.
- They must be visible to the sides of the vehicle, located as near the front as practical, and within a specified height range.
- They must illuminate amber. There is no requirement that they have an amber lens, but...
- There must also be an amber passive reflector located on the side near the extreme front of the vehicle, with similar height requirements as the sidemarkers. The common way this is accomplished is to make the sidemarker lens a passive amber reflector, so both requirements are covered with one part.
Audi did a sneaky (and stupid) thing for the North American market A3. Since the sidemarkers on the A3 are located in the curve of the bumper so they are visible from the front as well as from the side, Audi decided to use them as the front parking lights also (claiming that the one lamp meets both regulations and serves both purposes). I mean, come on.... all A3s in Europe have
City Lights, why not just do the same for the North American ones?
Some people incorrectly refer to the turn signals on the fender as 'sidemarkers'. They ARE NOT sidemarkers! They are properly called 'repeater turn signals', since they mimic or 'repeat' the turn signals on the front and rear. They are required in Europe and most of the rest of the world, where the regulation is roughly that a turn signal must be visible when you are at the rear of the vehicle and 1 metre to the side. In that position, you can't see either the front or rear of the car, so a turn signal has to be placed somewhere so that you can actually see it. This is usually on the front fender, above or behind the wheel well, but may be on a mirror or anywhere else that it accomplishes what it needs to do. These types of turn signals are
permitted but
not required in the US. They are
not to be illuminated with the parking lights,
only as turn signals. Personally, I insist that they must be present on any car I own.
The ECS sidemarkers are in fact passive reflectors, but white ones. They do illuminate amber since they have an amber bulb. So, the 'amberness' of the
passive reflector is the only part of them that does not comply with
FMVSS 108. Since the passive white reflector is actually brighter than the original amber one, I don't believe any safety or function is compromised by this cosmetic improvement, and I don't think that they'll attract any enforcement/inspection attention
(FMVSS 108 only applies to new cars made for sale in or imported for sale into the US. States may base their own regulations, inspection and enforcement on it, but strictly speaking, the Federal regulations have no effect on the owner of a vehicle. I Am Not A Lawyer, and This Is Not Legal Advice, just my understanding of it.) In any case, they're so easy to change that I could swap back to the amber lenses in a matter of minutes.
For the left one, open the hood and reach DOWN below the headlamp until you can feel the sidemarker from the back side. release the clip and push it out from the frontmost end. Unplug the bulb from the original one, change the bulb to the included amber 194 bulb, and reassemble with the clear lens in reverse order.
For the right one, squeeze the right foglamp grill (no tools needed, just squeeze in the right place) and remove the grill. Reach up through the opening beside the right foglamp (helps to have skinny arms) and pop the sidemarker out from behind. Replace the bulb and reinstall with the new lens.

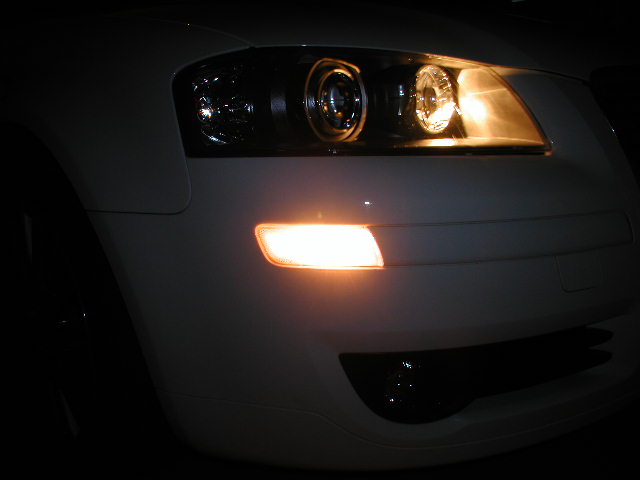
Illuminated at night (photo taken with full camera flash):

Illuminated at night (photo taken with slow camera flash):

Labels: HowTo, Upgrades
Ultimate Pedals
The same thing bugs me about the A3 that bugged me about my 99.5 GTI - the clutch is just too deep. When you have the seat/wheel/accelerator/brake all in the right positions relative to each other, there is no way to get the clutch all the way to the floor even if you hyperextend your left ankle. Pulling the seat forward 1 or 2 notches gives you good clutch control, but then your right leg is in a bad position. You have to pick which ankel/knee you want to punish, left or right, at any given time.
The lurch/hesitation off the line was really due to poor clutch control. It made me look like I don't know how to drive, and I was afraid of slipping off the clutch while parking and hitting something or someone. I could drive the RX-8 with it's wonderful clutch positioning and feel, and then get back in the A3 and thoroughly hate how it felt. I had to do something about it.
While other people were excitedly ordering the VW GLI pedals for their A3s, I decided to go for the 'form follows function' approach, which is most appropriate for this car anyway. I ordered a set of custom-fitted
Ultimate Pedals for the clutch and brake, in the frosted non-slip finish with domed rubber inserts.
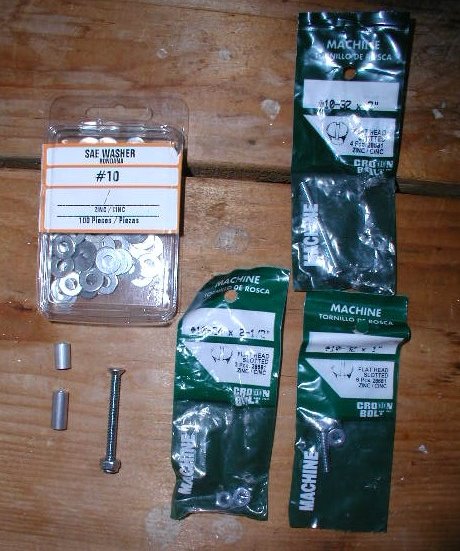
When they arrived, the pedals themselves were great but I was appalled at the included screws. They stuck up rather than fitting flush into the conical holes in the pedals. That was OK, though, because I had a plan that required different screws anyway....
From Home Depot I got some No. 10 fine-thread machine screws, flat head (for recess mounting) in various lengths, and corresponding nylon locking nuts for them. I also got metal sleeve spacers with a compatible inside diameter for the screws, in 1/2 and 3/4 inch lengths, and a pack of No. 10 washers. These screws fit the Ultimate Pedal covers perfectly, both in the diamter of the screw shaft and in the way that the head fits perfectly flush into the cover. This is what they should have come with.... I wish I could have found black powder-coated screws that would have been almost invisible next to the black rubber inserts, but that's probably asking a bit too much.

I removed the original rubber covers from the clutch and brake. The clutch pedal is plastic, the brake pedal is metal (by this I mean the actual parts attached to the car, not the covers). After deciding where the screws would go, I put the rubber inserts into the rest of the holes in the pedal covers that would not be taken up by the screws. I marked and drilled the clutch and brake pedals, and attached the brake pedal cover using the screws, washers and nylock nuts. I went ahead and bolted it down tightly since I wasn't changing anything about the brake pedal height.
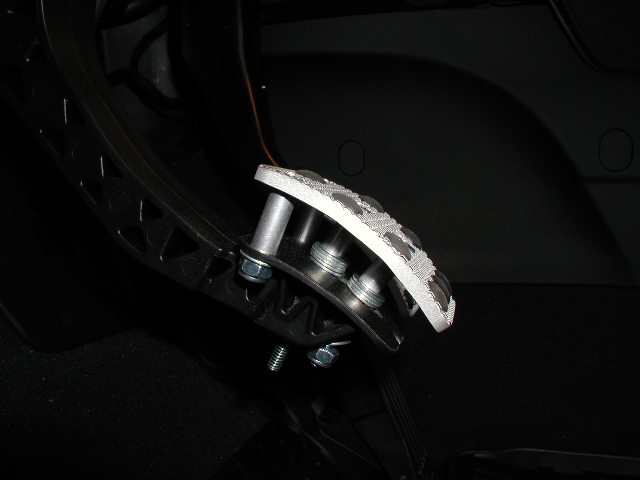
The clutch cover was the key to making it feel like I want. I used a 1/2" spacer on the bottom and centre screws, and 3/4" spacers on the top screws. That didn't fit right... the curvature of the pedal didn't cooperate with the spacer lengths, so I used some of the No. 10 washers to shim it out correctly - 5 washers under each 3/4" spacer, and 4 washers under each 1/2" spacer. The result is that the Ultimate Pedal cover is raised off of the actual clutch pedal a little over 1/2" at the bottom, and over 3/4" at the top. This plus the thickness of the Ultimate Pedal covers themselves gives me just under an inch of additional 'lift' on the top of the pedal. Angling it like this is crucial, because when the pedal is pushed down the angle with respect to your foot changes. The thickness at the top of the pedal is more apparent and useful when it is depressed, and less noticable when it is up, due to the angle. I almost went for even more lift on the pedal, but this has really done it for me nicely.

Now, it feels right. You can't see that the clutch has been elevated unless you stick your head down there, but boy can you feel the improvement! When in a comfortable, legs-not-squished position, you can stomp the clutch all the way to the floor without hyperextending your ankle or twisting in the seat. Taking off from a dead stop is much faster and smoother since you have more control over the clutch, and maneuvering to park no longer makes me feel like a little kid driving who can't reach the pedals.
Someday I'll get a VW GLI accelerator (part number
1K1 721 503 N for Manual Transmission cars, or part number
1K1 723 503 N for DSG/S-Tronic cars) to match the aluminum look of the clutch and brake. For now, though, this may be the best mod I've done so far.

Labels: HowTo, Upgrades
iPod Integration with DICE
Note: I originally did the iPod integration with a Dension ice>Link:Plus, but it developed problems and I returned it to the vendor (Enfig) for warranty replacement. Instead of just getting another ice>Link:Plus, I switched to the Digital In-Car Entertainment (DICE) interface instead. This article is mostly based on the original ice>Link:Plus writeup, which I've left up in case anyone's interested or has it bookmarked/linked.I never have been into portable music. All the cool kids had Walkmans, Discmans, whatever, but the whole concept did nothing for me - I've never had the need to listen to (whatever)
right now while walking down a street.
So, when the
iPod first came along in 2001, my reaction was "meh...." As it improved through later revisions I was mildly interested, but didn't see myself getting one. The 5th generation video iPod, though, was the first one that kind of grabbed me. Hmmm - rip some DVDs to have movies for airline flights.... but the real hook for me was the introduction of car integration.
Most people think of the iPod as just an MP3 player. I generally don't like the sound of compressed music at 192kbps MP3, or low-bitrate AAC. The iPod, though, will also happily play AIFF (audio interchange file format), the non-proprietary standard for raw audio. iTunes will rip CDs to AIFF if you choose, so you can have raw, uncompressed, unmolested, pure CD-quality audio, which is of course a LOT larger in filesize than MP3s would be. It's a matter of quantity vs. quality, but an iPod is a decently large amout of full CD-quality audio for the car.
Friday, 17 February, was my last day at my job. My friend (who worked for me and who took over my job) took up a collection for an 'unofficial' going-away gift, and when I came in for my exit interview he intercepted me and presented me with... a 30gig black Video iPod! Way cool.
Of course, the first thing that I did later that day was get a
Toughskin shock-absorbing/protective case. The second thing I did was order an interface for the A3 from
Enfig.
I wrote an article about that interface, but it developed problems and I replaced it under warranty with a
DICE (Digital In-Car Entertainment) interface. Dension is actually marketing the DICE now instead of their older products.
Here is a summary of the important points for this model:
- It connects to the CD changer connector in the glovebox. You can have either the glovebox CD changer, or this, but not both.
- If you have the in-dash CD changer, you can still use this. It connects specifically to the glovebox connector.
- If you have both a factory glovebox changer and a satellite receiver hooked up to the head unit, you're out of luck.
- Note: 2007 model A3s apparently no longer come with the glovebox CD changer cable. You will need to remove the radio (requires radio removal keys) and connect directly to the back of the radio.
- In addition to the iPod dock connector, there is a mini-stereo 'AUX IN' that could be used for any other portable or installed device you choose.
- You should have playlists set up on the iPod, but there is no mention in the DICE documentation of whether it has a limit on either the number of playlists or the number of tracks in each playlist.
- You select the DICE using the CD button on the head unit. If you have a disc in the head unit, press CD twice. The Display will indicate 'CDC' (CD Changer). If there is no disc in the head unit, pressing CD goes straight to CDC.
- Selecting 'Disc 1', 'Disc 2', 'Disc 3', 'Disc 4', or 'Disc 5' on the head unit changes functions, not playlists (this is different from the ice>Link behaviour).
- Disc 1 == 'Track' (Next/Previous or the left steering-wheel roller changes the song)
- Disc 2 == 'Playlist' (Next/Previous or the left steering-wheel roller changes the playlist)
- Disc 3 == 'Album' (Next/Previous or the left steering-wheel roller changes the album)
- Disc 4 == 'Chapter' (Next/Previous or the left steering-wheel roller changes the chapter for audiobooks)
- Disc 5 == 'Source' (Next/Previous or the left steering-wheel roller changes the source - iPod or AUX IN)
- With Disc 1 selected, you can fast-scan through the current track by pressing on the left steering wheel roller.
- It will pick up where it left off if you switch to FM and back, or if you leave the car and return.
- Current track name is displayed on the iPod display with the usual iPod interface.
- The iPod clickwheel interface is fully functional.
- The head unit will show tracks 1-99. You can actually advance past track 99 if you have more tracks in the playlist than that, but the head unit won't display the track number properly.
- The head unit does not show artist/track name.
Random Play Mode:
'Random' mode can be accomplished two ways. Of course you could set the iPod to shuffle and let it handle everything. This means that you do
not turn on 'random' on the head unit. When you advance to 'next' on the head unit/steering wheel, the iPod will then take that 'next' request and return some random song. This works the best, since the head unit seems to have a fixed algorithm for 'random' and you'll hear the same songs in the same 'random' sequence pretty frequently.
Or, if you don't want to use the iPod controls at all, you can just use the head unit: On the head unit, with the CDC (iPod) selected, press the 'Menu' button on the head unit and there will be a choice of Off, Random (Disc) or Random (Changer). Since the head unit thinks it's a changer attached, AND since the DICE uses the virtual 'Discs' for different features, this can give some freaky results if you don't understand what's going on.
First, don't use Random (Changer), since the virtual discs are just feature sets. You would have to use Random (Disc) on the head unit but again, this is not advised - use 'shuffle songs' on the iPod instead.
Second, how it randomises is based on which 'disc' you have selected.... if you're on Disc 1 (feature == songs), then it will randomly play among the songs in the currently-selected playlists. Advancing to the next song will make it randomly grab something else from that playlist. If you're on Disc 2 (feature == playlists), then a random 'next' will make it randomly switch to some other playlist (and start playing the first song in that playlist). Hearing only the first songs in your playlists gets old really quick. If you're on Disc 3 (feature == album), then a random 'next' will make it randomly switch to some other album in the currently-selected playlist. Again, hearing the first song of each of your albums in one playlist isn't what you want.
If You Want To Use Random On The Head Unit Anyway, This Is How:
- Random mode Off
- Select 'Disc 2' (playlists)
- Next/Previous or the left steering-wheel roller to get to the playlist you want
- Select 'Disc 1' (tracks)
- Random mode On
- Enjoy
Installation:
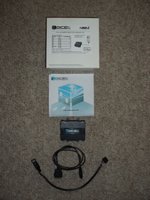 The DICE unit came as 3 pieces:
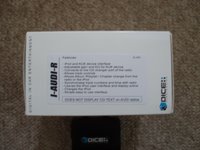
- The interface box (model I-AUDI-T2 - the model number printed on the box in the photos is incorrect!)
- The interface-to-iPod-Dock-Connector cable
- The interface-to-specific-car cable

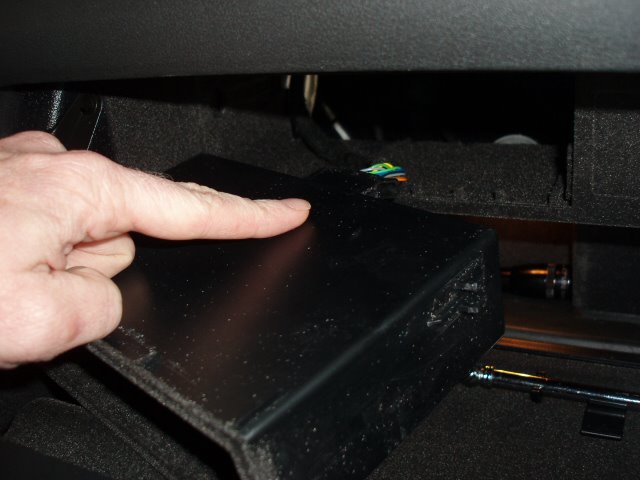
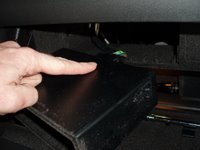
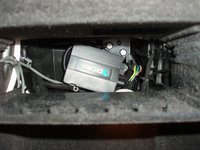
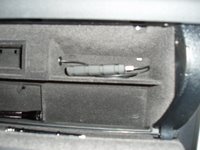
Remove the glovebox cubby. You have to get your hands in it as shown, and pull out firmly against the little lip on the bottom edge. One hand is shown in the photo (the other one was busy with the camera), but it took both hands for me to pop it out.
Disconnect the CD changer cable from the dummy plug on the back of the cubby. You have to release a catch on each side of the cable end of the plug.

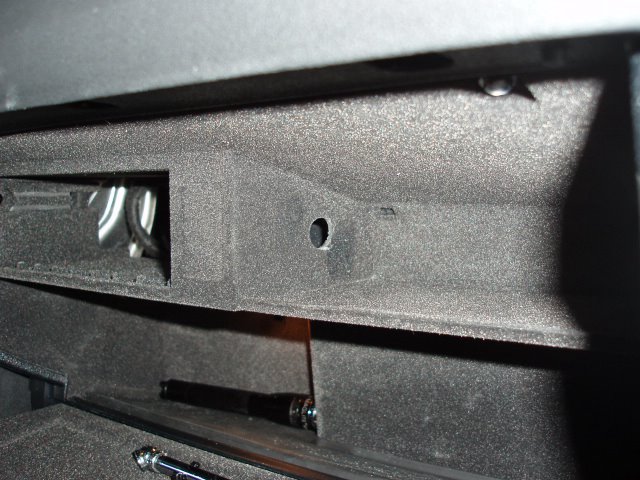
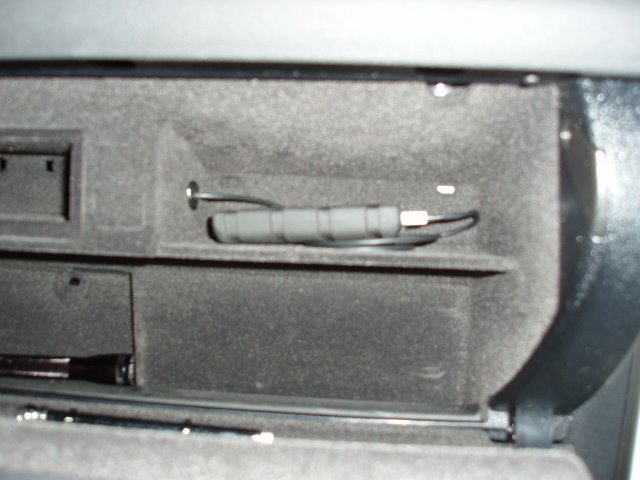
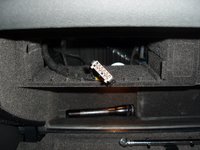
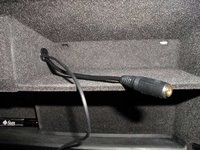
I wanted to use the smaller, non-removable cubby on the right of the glovebox for the iPod. I got a small pack of rubber grommets from Home Depot. These grommets have a 1/2-inch inside diameter, and fit into a 5/8-inch hole. I used a 5/8-inch wood bit to drill the hole, then dressed it with the little ~ 5/8-inch drum-sander attachment on a Dremel. The results are exactly what I wanted, but the process wasn't pretty, so I'm just posting a picture of the resulting hole!

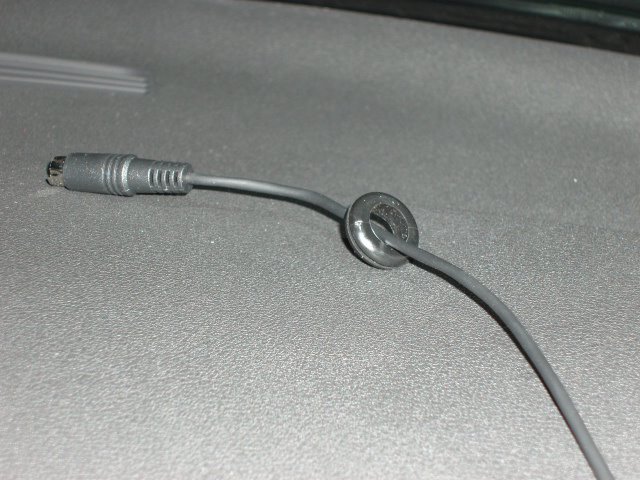
I took the iPod-to-DICE cable and fed it through a rubber grommet...

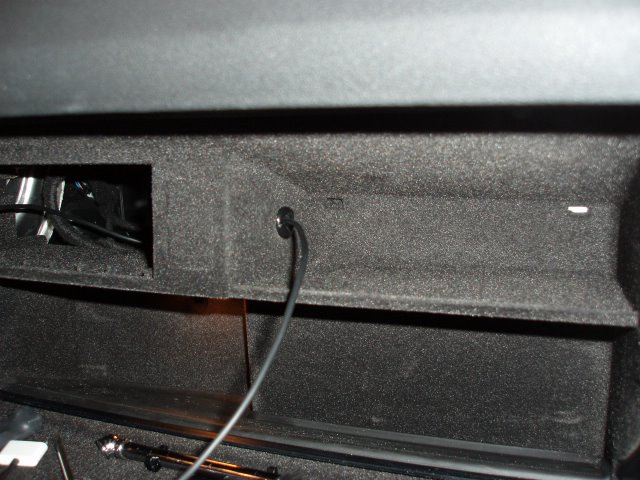
...then I fed the cable through the hole and got the grommet seated in the hole. Doing so required a little patience and a flat-head screwdriver to tuck the grommet in properly. The end result is a nice looking opening for the cable and no abrasion or chafing of the cable at all.
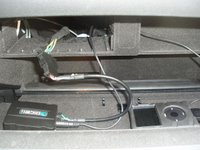
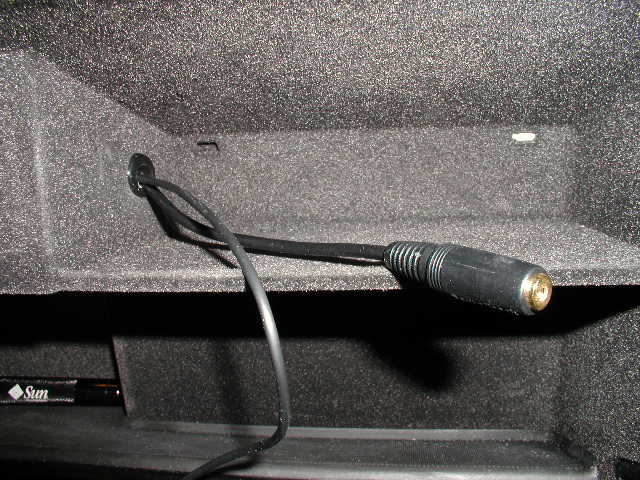
Here is the hookup. The CD changer plug from the car goes to one end of the DICE cable (large rectangular plug), the other end of that cable goes to the DICE interface box (small rectangular plug), then the iPod dock connector cable goes into the DICE box (round plug).
One more feature: The DICE box actually has two inputs - the iPod dock connector and a basic stereo miniplug AUX IN connector. I got a mini-stereo extension cable (1/8" mini-stereo plug to 1/8" mini-stereo jack) and passed it through the grommet alongside the iPod dock cable. This now gives me easy access to plug in any device I want and have the sound routed through the head unit via the DICE box.
I didn't want to just lay the pieces loose in the dash. The iPod cable is zip-tied to some other wiring harness stuff in the opening (to provide strain relief). The interface box and the other cables/plug were zip-tied to each other and to other wiring harness & supports. No stress, no rattles, no interference.
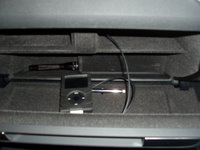

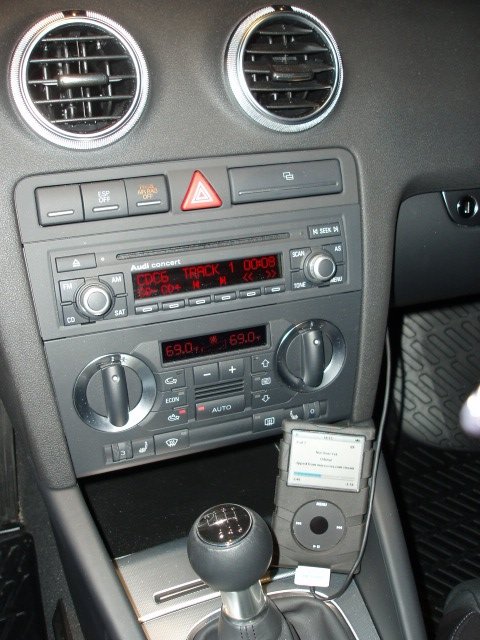
Because I keep getting asked.... No, the iPod is NOT mounted there. I just placed it there for the photo. It lives in the glovebox.
Done!Labels: Accessories, HowTo
© 2005, 2025, Some rights reserved. You may use information here on your own site only if you attribute it and link back to the source. This is a personal site, NOT AFFILIATED WITH Audi, Volkswagen, their parent companies, or any other media interest.