ProClip and Interface Cable
I've always kept my phone in the armrest console, so I
ran a power cable into it. The iPod
lives in the glovebox, connected to the DICE interface. I like having things neatly out-of-the-way, but planning for a 3rd-generation
iPhone, I'm going to want things set up a bit differently.
There are two parts to the ProClip system - the base that attaches to the car, and the holder for your specific device. In the case of the A3 there are three different base mounts. One attaches beside the head unit, and mimics the European Audi phone mount. One attaches to an air vent, and blocks airflow. The third type is the only one that I actually like for the A3: it attaches to the bar on the right side of the console. I got mine from a former A3 owner who traded up to a Subaru. The device holder he had was useless to me, so I ordered a new one (more on that below).
Here is the base mount:


This particular type of clip comes with double-sided tape to help hold it in place. The pre-owned clip that I got had the gummy residue still in it, and I didn't want to use adhesive anyway, so I set about modding it, starting by cleaning the old sticky stuff off with Goo-Gone.
I wanted it to stay in place, not scuff/damage the console where it was attached, and be easy to put on/take off. I had a piece of suede-finish leather that I had gotten from a craft store for another project...

...so I trimmed a piece to fit exactly in the U-shaped portion of the clip with no gaps:


I then glued it into the clip using 1-minute epoxy. (That stuff is amazing, but I really recommend doing this with the 3-minute epoxy instead so it doesn't set up so insanely fast.) I don't have a picture of it after I glued the leather in; it looks like this, only adhered tightly into the corners and all the way around.

I ordered a new device holder from
ProClip.
The Adjustable Holder with Tilt Swivel - Item 875214 which will hold the iPhone with or without a 'skin' or case. It will also hold my old iPod with it's heavy-duty rubber skin.
That takes care of the mount, but my DICE connector is still in the glovebox...

A 6-foot Dock Extender Cable from
CableJive will take care of that. It's the only male-female iPod Dock Connector cable extension that I have found, and it is a very high-quality product.
I wanted to run the extension from glovebox to the console, so I could either keep the iPod in the glovebox, or use the extension for the iPod (or
whatever) in the ProClip. It turned out to be easier than I expected.
I pulled the cubby out of the glovebox:
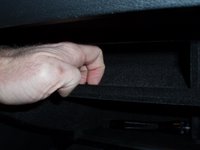
Some mods need to be done here. I decided to re-think how I routed the dock cable, and relocate it to the left cubby so it would be near the new extension cable. On the back of the cubby there's this clip that needs to be opened up:

Here you can see the opening that I cut using a hacksaw blade.

I drilled the remaining portion of the tab so I could use zip-ties if necessary for strain relief, but that turned out to not be necessary for me.

I also had to drill another 5/8" hole for the DICE cable, and used another rubber grommet to protect that cable from chafing. The female (jack) end of the extension cable went through the rectangular opening.

I fed the cable male (plug) end first through the opening and down towards the console:

...where you can slip your fingers under the edge and feel for it, then pull it out:

Loosening this 8mm bolt on the underside of the glovebox makes that part easier:

Next, pull up on the trim ring around the shift boot. It is held down by a spring clip at each corner.
Tuck the cable up under the side of the console, poke the plug up by the shifter, and pull it through as shown here:

Now remove the two Torx T-30 screws holding down the front of the ashtray assembly. These also hold two of the spring clips, so don't drop anything. Carefully lift so you can unplug the light connector, then slide the ashtray assembly completely out.
With the ashtray out of the way, I repositioned the cable so it comes up through the opening shown here (this is what it looks like with the ashtray assembly removed):

(If you still have the little insert in the ashtray, go ahead and remove it now.)
A hole has to be cut in the bottom of the ashtray for the dock connector plug to fit through. I somehow neglected to get good pictures of the process... I cut the rectangle out using a Dremel on slow speed with a cut-off wheel, then dressed the edges of the opening with a file to remove any sharpness that could chafe the wire. The rectangle is cut as far right as possible in the bottom.

So much for getting the cable into the ashtray from the bottom, now we have to get it out the top. Looking at the edge of the ashtray you can see there's a gap under the lid when it's closed, but you can't just run the cable there since the lid needs that much space for the 'push-to-open' function. So, we'll have to do some cutting.

You can't run the cable to the front because it would interfere with the trim around the shift boot, so we'll have to go to the side.

Remove this piece of rubber:

I used a flat file to cut this notch and 'soften' the edges, then wet-sanded the cut edges with 600-grit sandpaper.

A corresponding notch was made in the lid, but only in the plastic. It would work better if aluminium trim were notched also, but leaving the aluminium undisturbed is a compromise in favour of aesthetics.

The rubber piece that was removed earlier was re-installed, completing the ashtray modification.

The cable can be fed up through the rectangle in the bottom of the ashtray, and the assembly can be reinstalled and bolted down. Don't forget to plug the light in:

There is plenty of space under the console for the cable to drop into when not in use. Due to the natural alignment of the structure underneath, the plug cannot fall through the rectangle you cut in the ashtray.

On the glovebox end, the cubby can now be snapped back into place. You can either plug the iPod into the DICE connector and keep it in the cubby in the glovebox, or you can plug the connector into the extension cable as shown here:

The next piece of the puzzle is a CableJive Charge Converter. The older iPods and 1st-generation iPhone use one set of pins in the dock connector to charge via 12volts, and another set of pins to charge via 5volts. For various reasons (heat, component size, etc.) Apple has eliminated the 12volt charging circuit from newer iPod and iPhone models. Since my DICE interface provides the high-current charging circuit, it will not power or charge newer devices. The simple solution to that is the Charge Converter from CableJive. I can plug it in-line between the DICE plug and the extension cable, so any iPod/iPhone plugged into the extension will be perfectly happy:


The Charge Converter also has a mini-USB output on the side, so it can charge or power another USB device as well. Just an added bonus feature.
Here's the finished product. I have a little piece of leather that I cut to fit the ashtray to keep coins from rattling - that's what you see under where the plug is laying. I can feed the cable down into the console, close the ashtray, and it's completely invisible:

...or I can position the cable through the notches and close the lid:

It all comes together - cable, clip and iPod:

And since sexy things always look better naked, here's the iPod without the Speck case. The 5th-gen 30Gig iPod doesn't fit very tightly since the adjustable holder was designed for an iPhone
with a case/skin, but it works.

(In case anyone is wondering, the song playing on the iPod is the version of "Modern Love" by
The Last Town Chorus.)
Expect an update to this article mid-2009.
Labels: Accessories, HowTo
Custom Trailer Hitch
Please Read:
I constantly get requests for plans/CAD drawings/etc. for the vertical-receiver hitch design. For liability and copyright reasons, I will not provide any plans or drawings. Please do not email me to ask where you can buy a hitch for the A3.
I frequently get emails asking questions that are clearly answered in this article. Please read every word of the article thoroughly. Everything I know about this or any other A3 hitch is in the article. If it's not in the article, I don't know it. Emails asking for plans, where to buy, or anything else already covered in the article will not be answered.
Ever since I first considered had the A3 I wanted a receiver hitch for it. I've had them on various other cars for pulling JetSkis and stuff, but never got around to putting one on my GTI. One problem with owning a hatchback is that everybody expects you to be their truck. I really didn't want to use my new car for that, especially things that could damage the interior, so the ability to pull a small trailer was important. The lack of an available hitch was a strike against the A3 when I was shopping but I decided that, worst case, I'd design my own.
After I got the A3 I started looking into the European hitches that were available for it. The best hitches are made by
Westfalia Automotive, and I believe they make the ones that Audi sells in Europe. European receiver hitches are designed quite differently from American ones:
- Euro-style receivers are vertical, or close to it; not horizontal.
- A J-shaped bar goes into the receiver, and has the ball on it.
- The receivers have a much more sophisticated attachment system for the J-bar than the simple pin used in the US.
- The ball is part of the J-bar, not removeable.
- All balls are 50mm; by comparison, a US 2-inch ball is 50.8mm.
- European hitches do not have loops to attach safety-chains, which are required in the US.
- Most of the European hitches for the A3 take the place of the bumper reinforcement bar.
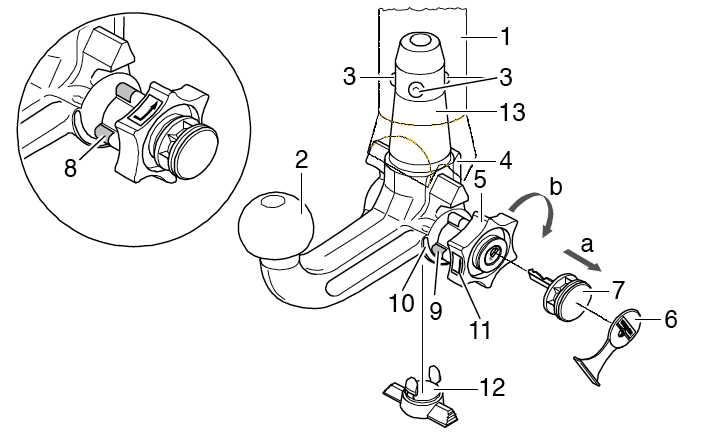
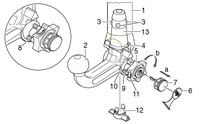
Here is a drawing of a European ball & J-bar for an A3:
My first thought was to obtain a European hitch and modify it. That proved very difficult - most vendors (including Westfalia) refused to sell to anyone in the US. Some eBay sellers would sell to me, but shipping costs were huge. Just to get a hitch (that I couldn't have used unmodified) would have been around $800, and then I'd have to modify it a lot. I was also really afraid of the wrong item being shipped to me, and being stuck with either an expensive unusuable hunk of steel or a huge return shipping expense.
UPDATE:
www.oempl.us imported the Westfalia hitch to the US for a while. It was an updated model that DOES include safety-chain loops. They also carried the required replacement valence. The only downsides are that it's expensive and you can't attach a US-style bike rack.
So, I began designing one on my own. I had a good plan of what I wanted it to be like, but didn't have the help, or the money, to make it real (my CAD skills are pretty lame). I contacted a major US hitch manufacturer and tried to get them to make a hitch for the A3, but that didn't work out - they needed a car to prototype on, they were too far away to use my car, and I couldn't coordinate getting anyone closer to them to do it.
This summer I got an email from somebody who had just bought an A3, desperately needed a hitch, and had seen one of my hitch-related postings on the AudiWorld forums. Joe and I began collaborating on the design - he's an engineer and drafts metal parts in CAD all the time, so it was a perfect match. We both agreed on the approach, and quickly refined it via email and phone. Once we had the design worked out, I approached the hitch manufacturer again about producing it and provided them CAD drawings of the design. We were to receive the prototypes for testing, and they could then produce our finished design.
It hasn't turned out
exactly that way. We received the prototypes, provided feedback, and were convinced that there was nothing in the way of having this great design available to the rest of the A3 community. However.... later we were told that '...the powers above...' in the company had overridden the design, and decided that the concealed vertical receiver would be replaced with a conventional, exposed, horizontal receiver. This completely destroys the design intent of the hitch, and Joe & I do not consider it to be 'our' design that they will produce.
For now, I'm considering this to be one of only 2 custom hitches made from my concept.
- It has a vertical receiver tube that is completely concealed behind the bumper cover.
- When the ballmount is removed, no part of the hitch is visible.
- The safety-chain loops are also concealed above the lower edge of the bumper cover
- The original bumper reinforcement bar is retained, satisfying SCCA requirements for certain autocross classes.
- It can be installed by one person with hand tools and a drill in about 1.5 hours.
- It is compatible with the standard and S-Line bumper valences, and appears to be compatible with the Votex valence.
- With a 90-degree adapter (which I will have fabricated soon), it's a great way to carry a bike rack or ski carrier.
Before Installation:
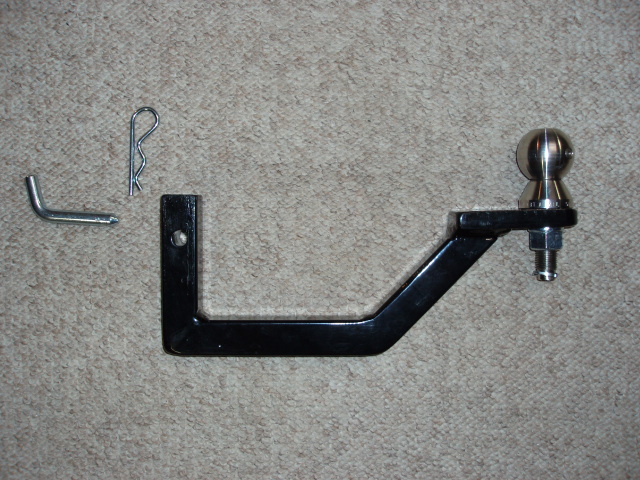
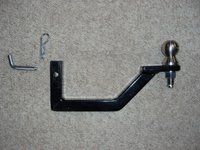 Ballmount designed for vertical receiver.
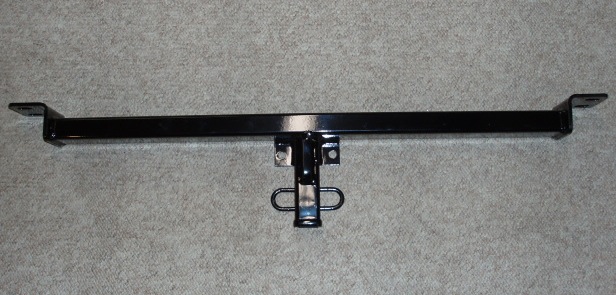
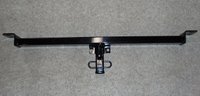 The hitch, as viewed from the rear of the car. The flanges on the end rest on the bumper supports, and the receiver tube points downward.
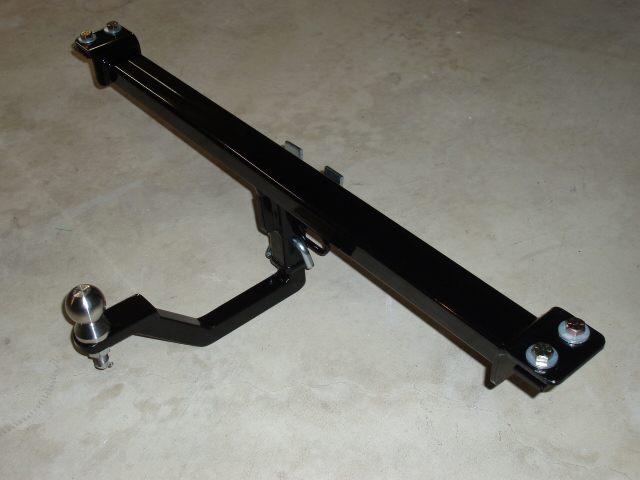
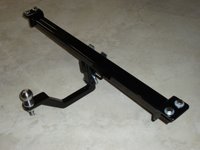 Assembled ballmount and hitch, with hardware.
The Result:
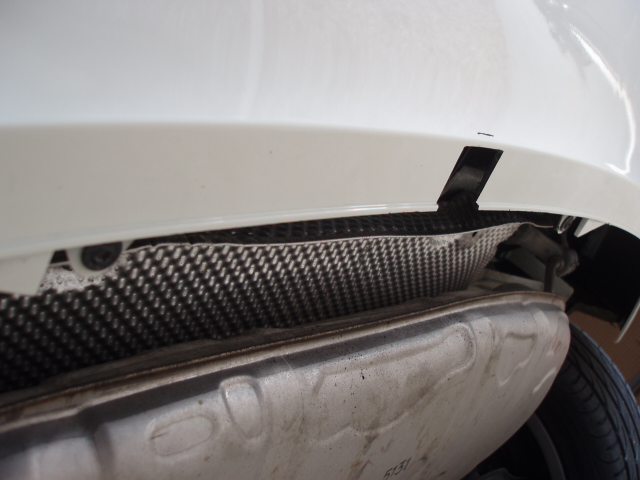
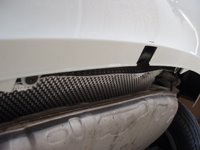 The tab of plastic between the two underside mounting screws on the bumper cover was trimmed off behind the ridge, and a notch was cut into the bumper cover: 4.5cm wide x 3.5cm deep from the new trimmed edge of the cover. This allows just enough for the receiver, and a gap for reaching up to the pin and safety-chain loops, but is completely unnoticeable unless you stick your head under the bumper.
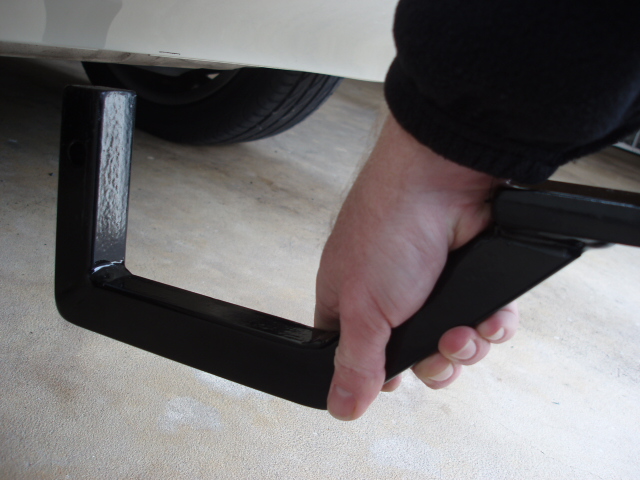
 The ballmount is inserted into the receiver tube vertically....
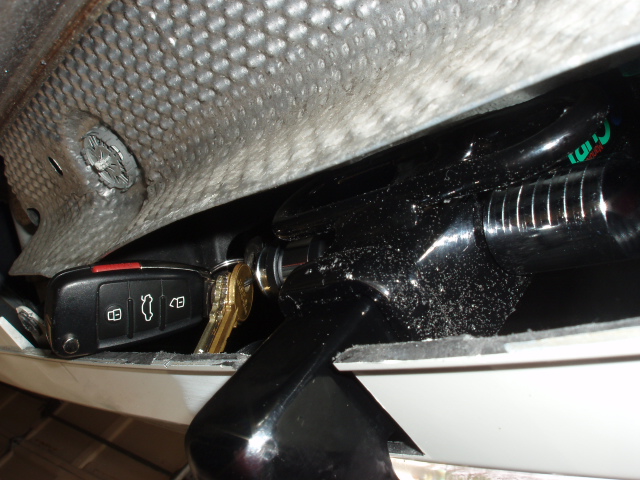
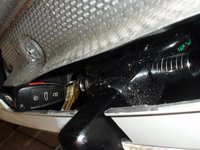 ...and secured with a pin. I use a Master Lock keyed locking recever pin (see below). You can see that there's just enough space to use the keys. The rear edge of the bumper valence will be smoothed and painted as soon as my touch-up paint kit arrives.
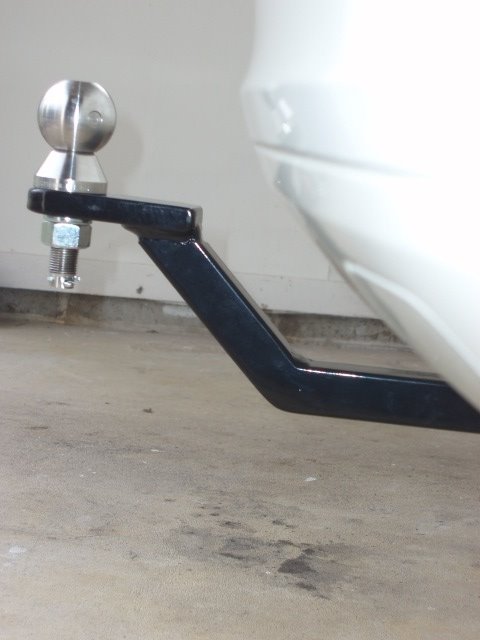
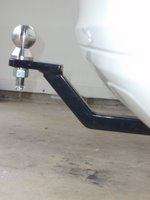 The ballmount in place. It will clear the standard, S-Line and Votex valences, as far as I can tell.
Interchangeable Ball System & Locking Pins:
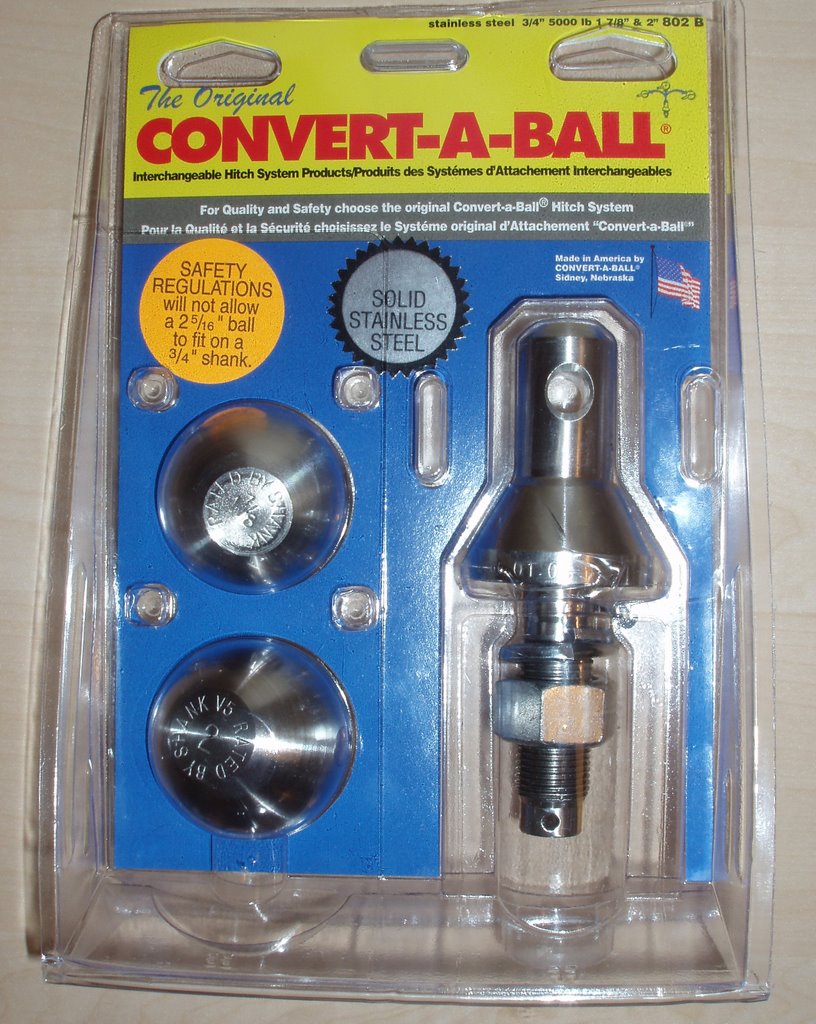
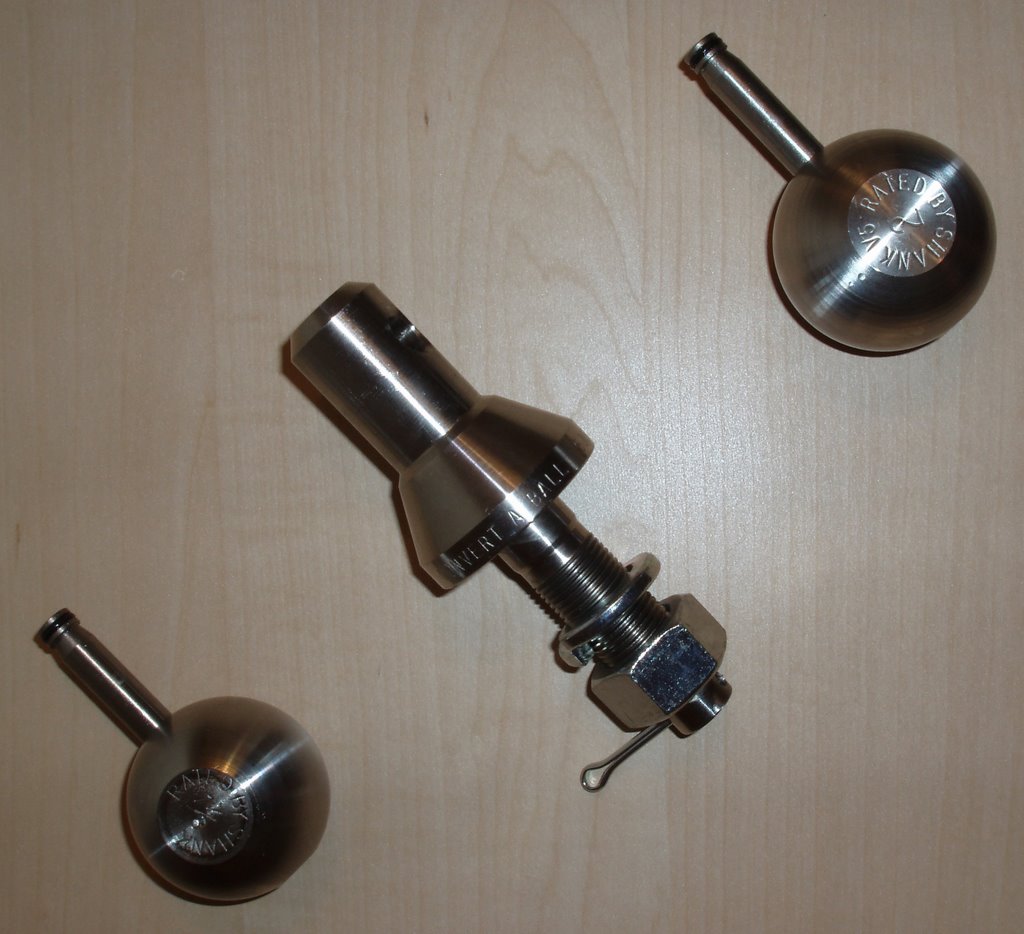
 I like this ball system better than any other I've seen. It's stainless steel, and the 1-7/8" and 2" balls can be swapped in under a minute.
 The part shown in the centre of this photo bolts down like any other hitch ball does. The ball drops on top of it, and the captive pin holds it in place. When a trailer coupling is attached, it covers the ball so there's no chance of the pin working loose.
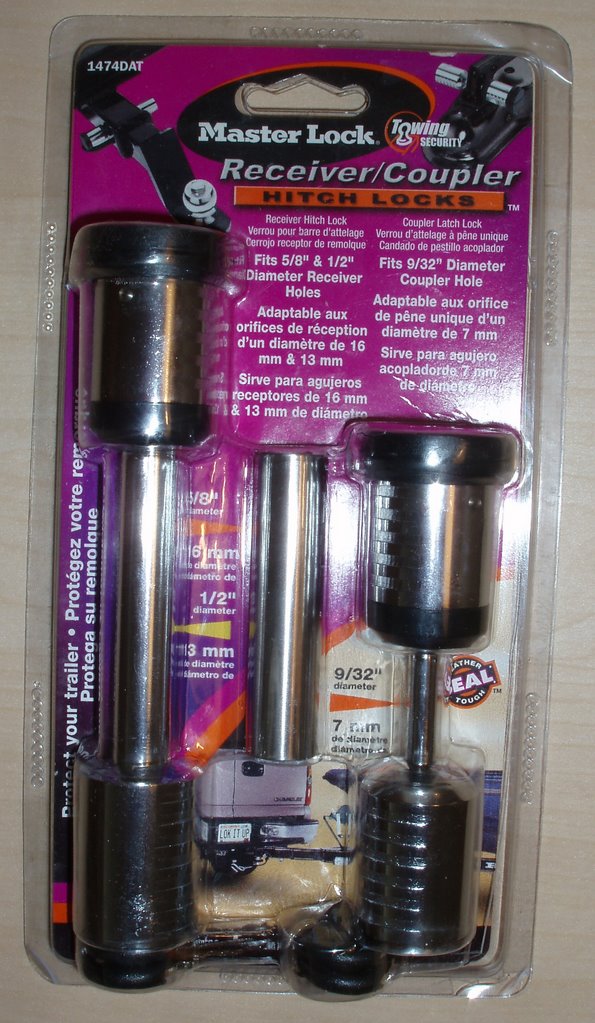
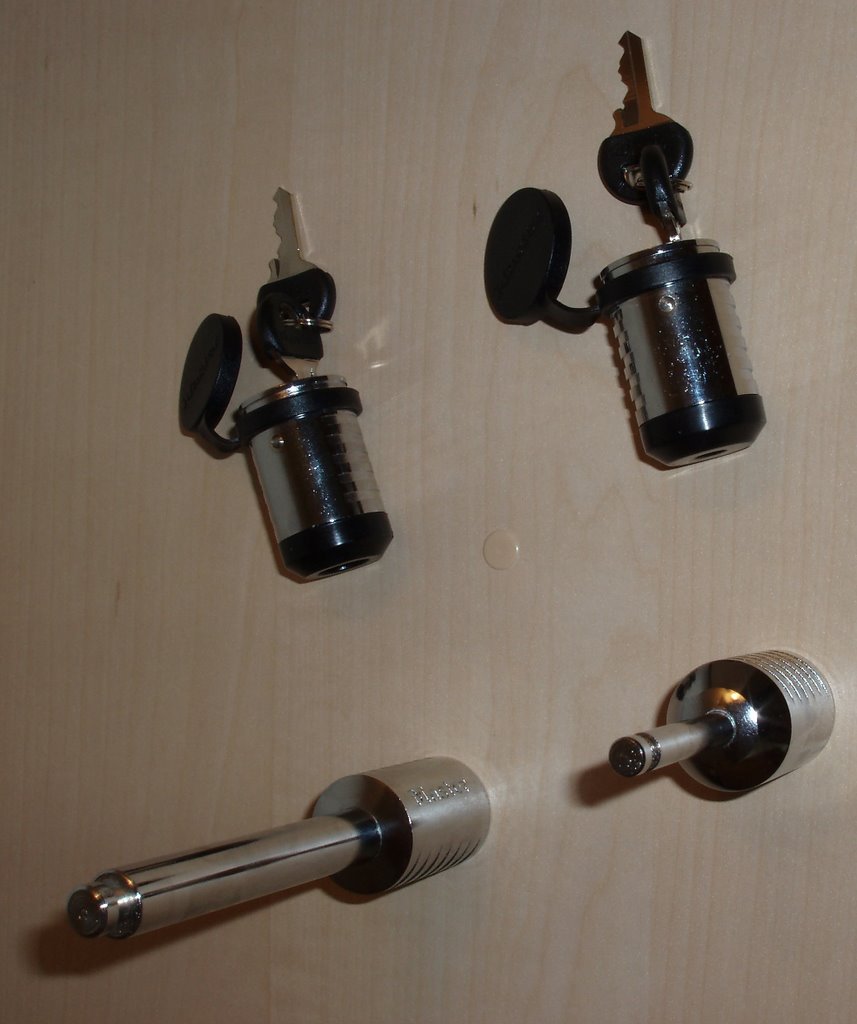
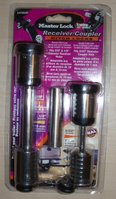 This Master Lock set has both a locking receiver pin, and a locking trailer-coupling pin.
 It's a keyed-alike kit, so all 4 keys that came with it operate both locks. I keep one key with each of the fobs and the valet key, and one hidden in the car. The key cannot be removed unless it is in the 'locked' position.
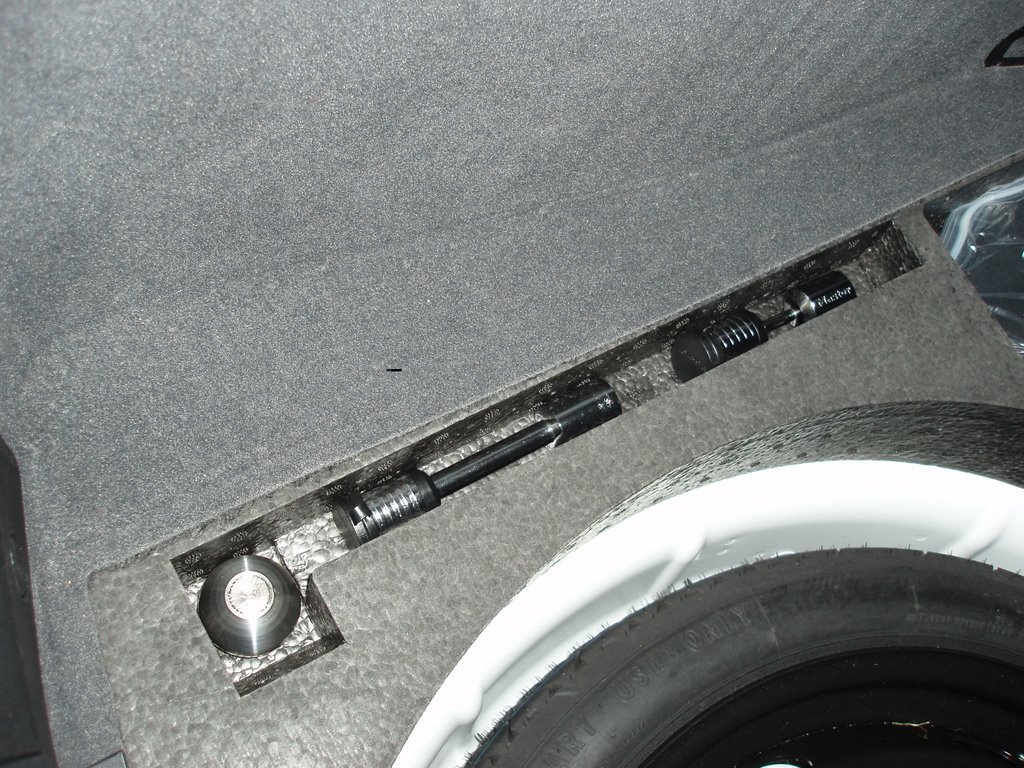
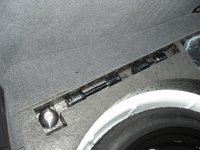 The best part of these accessories is that there's a perfect place to keep them....
More Photos of the Installation Process:
Here are my co-designer's photos right after he got the first prototype installed, hooked up and test-driven (originally posted on
AudiWorld.
For electrical hookup information, see my
A3 Trailer Lighting Wiring Instructions.
Update: May 2008
One downside of this design is that I couldn't attach a bikerack without an adapter. I had the design for an adapter all along, but was just slack about getting it made, mostly because I didn't know where to get the welding done. Recently I got a referral to someone who could help with the fabrication, so I went ahead with the project.
I started by ordering a
1-1/4" receiver fabrication part from
eTrailer.
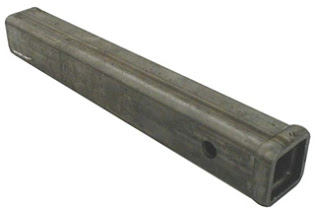
The person who did the fabrication for me had the steel shank, and did an excellent job.


Labels: Accessories, HowTo