Bluetooth Phone Kit With Concert II Radio Integration
One of the first things I did with the A3 (the day after I picked it up) was to install a bluetooth handsfree cellphone kit. A long time ago I had gotten a SonyEricsson HCB-30 kit, and never installed it in my old car, so it was ready and waiting for the A3. The HCB-30 has been discontinued - the best available kit right now is the Motorola blnc IHF1000, and installation should be pretty much identical to what's described here.Initially, I used the speaker included with the kit. It sounded OK like that, but I wanted 'real' integration with the sound system. In April of 2006 I found the nugget of information I was looking for, and have edited this posting with the updated info and photos.
Installation:
Remove the fuse cover on the left side of the dash carefully, then remove the 1 silver bolt in there (attaching the lower dash panel) using an 8mm nutdriver. Remove 2 identical bolts from the lower part of that panel in the driver's footwell. Pull the panel straight towards the rear of the car, away from the dash. Don't try to 'peel' it off by pulling from the bottom, it has to go straight back. Try pulling from near the top.
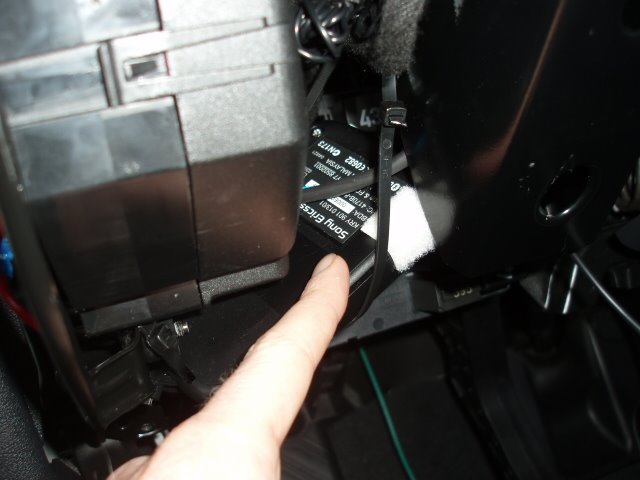
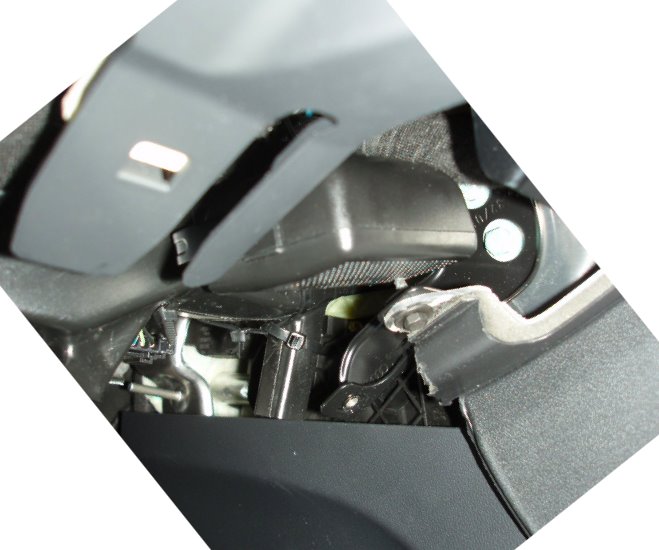
The controller box for the bluetooth kit was zip-tied to the main dash support on the left hand side, hidden behind the lower dash panel.
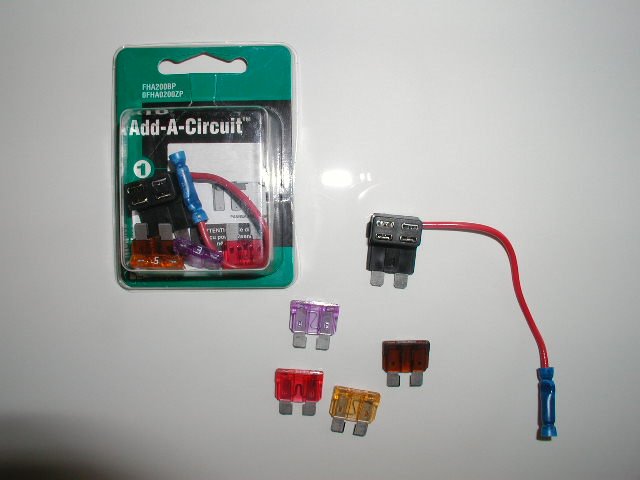
Power (constant +12V and switched +12V) were conveniently obtained by using a piggy-back fuse arrangement in the fuse-panel. These are the 'Add-A-Circut' (FHA200BP) for the standard fuse size, and the 'MINI Add-A-Circuit' (FHM200BP) for the smaller fuse size, made by Littlefuse. I found them at a local auto parts store. You'll need one of each for this install. They hold two fuses each - the lower fuse is for the original circuit, and should be the amperage that was originally present in that slot. Just reuse the original fuse. The upper fuse is for the new circuit you're adding, and should be the appropriate amperage for that. It is EXTREMELY IMPORTANT that you install these devices in the fusebox in the correct direction - if you don't, the fuse winds up being downstream of the circuit, which is useless and potentially dangerous. You test this by plugging it into the fusebox and checking the voltage with and without a fuse in the upper position. If you still get power with the fuse not there, it's backwards.... For the A3 fusebox, having the pigtails pointing down is the correct orientation (but check it yourself to make sure).
Other things you will need are 18-22 gauge butt splices, 18-22 gauge tap splices, and an 18-22 gauge round lug connector, as well as a strip/crimp tool and a lot of large and small zip-ties.

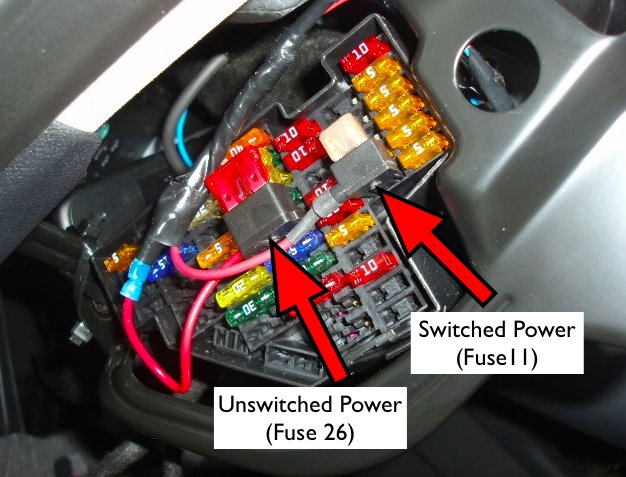
The bluetooth kit requires both constant power and switched power. The constant power was obtained from Fuse position 26 (Power outlet in luggage compartment) with the larger size and a 10-amp fuse, and the switched power was obtained from fuse position 11 (Adaptive Lights) with the smaller size and a 5-amp fuse.
Ground was obtained by a round lug connector attached to this bolt position.

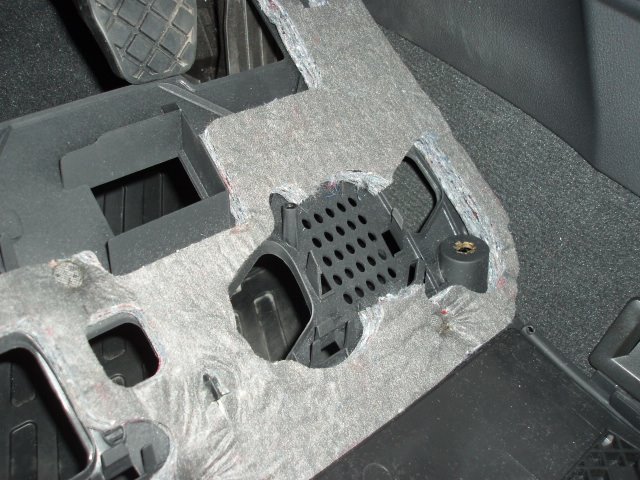
Initially, I used the speaker included with the kit. I installed it completely hidden behind the driver's lower dash panel near the accelerator. There's actually a spot there with perforations that looks like a speaker was intended to fit there. The speaker for the kit doesn't exactly fit in that opening, but by removing some insulation over the perforations and zip-tying the speaker to the dash structure in the right spot above it, it works perfectly and is completely invisible.
The microphone cable was run up behind the A-pillar cover, and the mic itself clings to the upholstery with a spot of velcro. I'm not entirely happy with the microphone (sensitivity or placement/appearance), so I'll update this after I make some improvements.

Here's where it gets really cool....
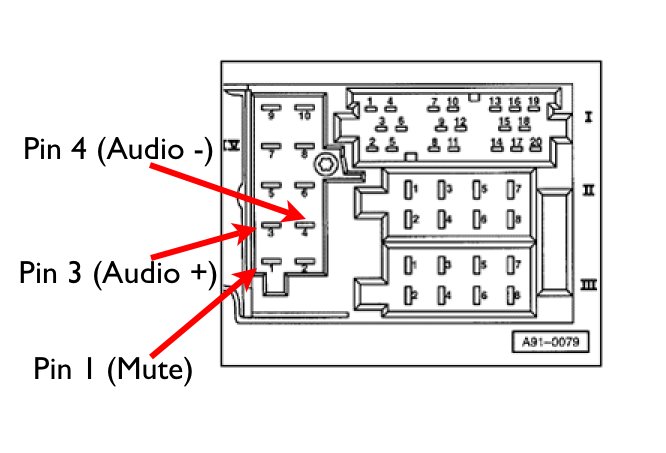
I always suspected that there had to be a mute feature (at least) on the radio for the factory phone integration. When I finally got a wiring diagram for the radio, there it was... plus something I had not really expected: audio input!
This wiring connector is the same on both the Concert II (single-DIN unit) and Symphony II (double-DIN unit with cassette, with Bose system), so these instructions apply to either model.
On Connector 4 (the vertical one), pin1 is for the mute wire, and pins 3 & 4 are the "+" and "-" audio input, respectively.
You need the correct radio removal keys to take the radio out.
Connecting to the radio pins with generic connectors: (see farther down for a better solution, this is temporary for me)
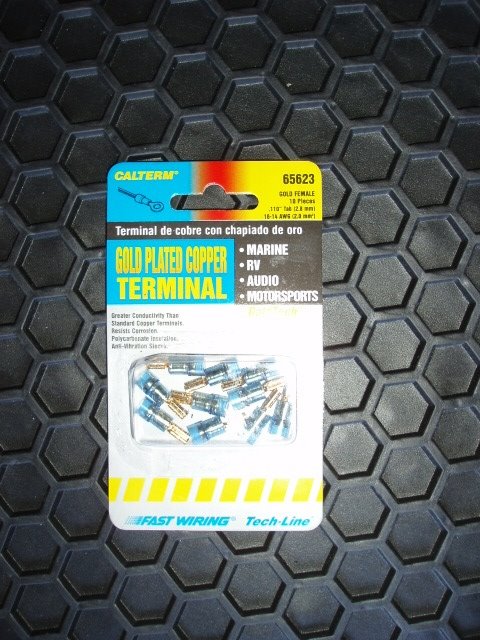
Since there was no plug at all present for this connector, I got appropriately-sized female blade connectors (Calterm 65623) for my wiring.
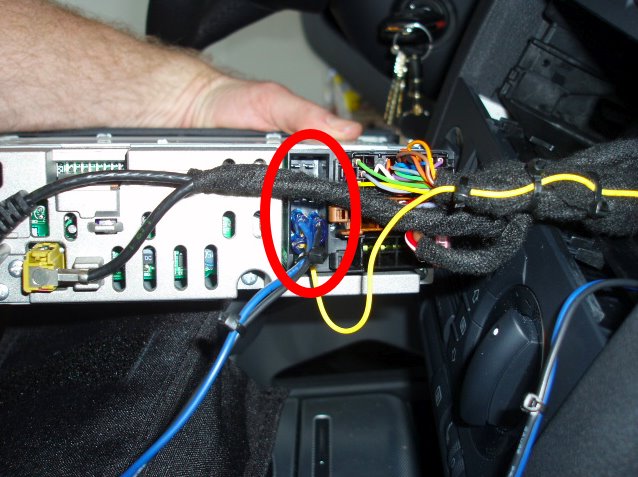
The blue and black ones are the ones I ran for the "+" and "-" audio, and are spliced into the bluetooth kit's speaker wires. Make sure you get the polarity right. When you crimp those connectors on, you have to squish the crimp on the sides, not the 'top and bottom'. If you squish the crimps the wrong way, they'll be too wide to fit side-by-side in the connector on the radio. Look at it before you do the actual crimping, and you'll see what I mean.
The yellow wire is the bluetooth kit's 'mute' wire.

What is not shown in the photo is how I insulated them to keep them from touching. I squeezed the connectors a little before pushing them onto the blades in the radio to make sure they fit tightly. I then folded up some electrical tape and looped it in between them, and trimmed a plastic zip-tie to have a piece of plastic to push in between them and keep all the pins separated. It's all a good, tight fit, with no worries about anything vibrating loose or shorting out. If you follow the instructions below for using the genuine Audi plug & wires instead, this will be a non-issue.
This photo is just before I did that insulation:
Connecting to the radio with genuine Audi connectors:
No photos of this are shown, since I haven't done it yet. I'll update the posting when I do.
Since I did the install, I've found the part numbers for the actual plug and the corresponding 'repair wire' pins from Audi.
The plug housing that fits in Position 4 is part number 357 035 447 B (10-pin (5x2) red) and the corresponding 'repair wires' are part number 000 979 225 (2.8mm connector, 2.5mm wire). {You may also be able to use repair wire part number 000 979 133 (2.8mm connector, 1.0mm wire), just the wire will be smaller diameter.} You will need 2 of the 'repair wires', since you cut each one in half, so that will give you 3 connectors with leads to use, and one spare. If your dealer does not have the wires in stock, I think they have to order 5 at a time, but you don't necessarily have to buy all 5. If you want 10, they need to know to order enough, in other words. Cut the repair wires in half to give you pins with leads attached, then snap three of the pins into the correct positions on the plug housing as shown in the wiring diagram above. That gives you a 'real' plug that fits the back of the radio as well as any factory solution would.
Update, January 2007: I received the following information from someone at a 'major corporation' who wishes to remain anonymous:
"Audi already has handsfree adapter harnesses available for these radios. The Audi radio adapter part numbers are:
8D0 051 434 for vehicles that still have an Ignition signal at the radio, and
8E0 051 434 for vehicles that don't have the Ignition signal at the radio.
From about MY2002 forward, the radios all have the ignition/accessory control information sent to the radio via the CAN bus in the vehicle. There is no longer a discrete wire that has a simple 12V / 0V signal available at the radio.
As regards the handsfree adapter harnesses, for radios with a ignition (sometimes called S-kontakt) signal, at the radio, there is no extra work to connect the latest IHF1000 and T605 carkits to the adapters. For MY2002+ vehicles, a line will have to be connected to a suitable ignition on/off signal in the car, an extra step in the harness installation.
These harnesses will not work in the D3/A8, and the C6/A6. They should still be fine for the current A4, A3, TT, and the past D2/A8, allroad, etc. They will work with vehicles with the Symphony 2 radio, and most Symphony 1 and Concert radios should also work (although there might be an exception here and there...not sure).
[...]
[The] current version of the [Motorola IHF1000] kit (the 98676K) will actually plug straight into these Audi adapter harnesses..."
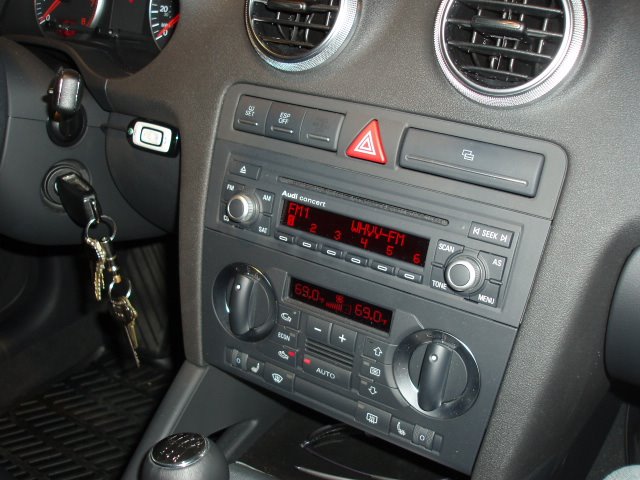
Here's what it looks like normally, with the radio on. The black and silvery-white item on the dash behind the wiper stalk is the control for the bluetooth kit (answer/hang up/volume/etc.)...
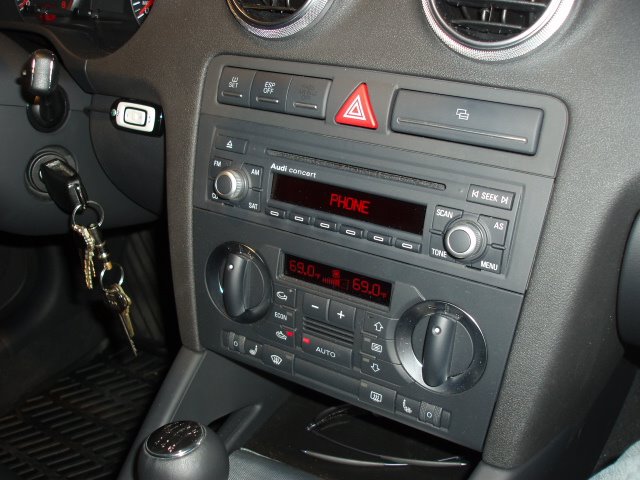
...and here's what it looks like with the phone active in a call!
Operational features:
You pair your phone with the kit. After that, when you get into the car and turn on the ingnition, the kit initiates a connection with the phone. The radio briefly mutes and displays 'Phone', then returns to whatever it was doing.
When you make or receive a call, the radio mutes and displays 'Phone' as long as the bluetooth audio link is active. If you are playing a CD or iPod (connected with a dock-connector interface), it will pause playing and resume from that point when the call is ended.
Audio from the phone is heard over the stereo speakers, and sounds as good as a phone can. It doesn't matter if the radio is on or off. It also doesn't matter if the ignition is off, it still works. The radio volume control (and the steering wheel volume control)have no effect on the phone audio - that is dependent strictly on the volume control of the phone/kit.
The bluetooth kit maintains its connection to a phone if you are in a call when you shut off the ignition.
Audio input to the radio is dependent on the 'mute' being triggered. It's not independent, so this would probably not be a good way to integrate a GPS (like a TomTom or Garmin) unless you want it to completely mute the radio. There may be other pins that are used for input, but I haven't experimented with that yet.
There are two ways to initiate a call:
1. Dial from the phone keypad as usual,
- OR -
2. Since I use a Motorola V551 (through AT&T), it has the 'voice tags' feature. In the phone's contact list, I edit a person's entry and select 'add voice tag'. I record whatever I want (usually the name + 'work' or 'cell' or 'home'), and it attaches it to that phone number. If you're going to use this feature with the handsfree, you need to record the voice tags throught the handsfree instead of the phone mic. That way it 'sounds' the same to the phone when you use them later. You should record all your voice tags sitting in the car with the engine running, but not moving so there's no wind/road noise to interfere.
If I want to call my friend at work, I press the 'talk' button on the controller on the dash until it beeps, and say ROB...WORK (which is what I recorded for his voice tag). It then plays the voice tag back to me so I know it's dialing the right person. I put my voicemail number into the regular contact list along with the pauses and password, and added a voice tag of 'CHECK VOICEMAIL'. That's about my favourite feature on it.
Unfortunately, Motorola phones don't do unique rings over bluetooth kits, so there's no non-visual way to know exactly who's calling. I keep the phone in the armrest.
Update, June 2008: I'm getting a new phone soon, and will update this post with some new info!
Labels: Accessories, HowTo
posted by Len @ 02:00
![]()
![]()

